The new robot uses very little wiring. None of the wires have been soldered. I have also replaced the mounts for the sensors. I will describe everything in today’s post.
Before we begin, you’ll need to know how to design and build your own PCBs. A friend of mine has written excellent, very well explained tutorials for this. He uses Eagle. I will try learning KiCad for you free software folks. I’m having trouble with it though (Do pop in a comment if you would like to help me out) . Here are the links to the tutorials:
I would suggest going over his circuit if you need some confidence. I made the line follower circuit for my first PCB. It’s simple too so you could try that as your first PCB.
Assuming you know how to make PCBs, here’s what you do. Make one main PCB for the L293D. You’ll need two other small PCBs to put the sensors. I’ve uploaded the eagle files containing my designs. You can download these from the Box.net widget on the right sidebar. Look for bruno-eagle-files.zip and LEDLDR-eagle-files.zip. I would suggest designing the PCB yourself for practice. Your design may be much better. I have a lot of inconsistencies in mine.
Here are photos of my PCBs:
The main L293D PCB:


All that labelling was to make the soldering easier. However I messed up while using the lacquer spray.


So those are the boards. Also remember to drill holes for the main PCB. I forgot to do this till the end. Drilling after soldering is a pain. Next step is to solder the components. Check all connections with a multimeter. At this point you can even check if the LEDs are lighting up and if the LDR sensors are working. Remember – do not plug in the chip till you have done this bit of testing. After you’ve checked that all the voltages are right, put a protective coat over the copper side of the PCB. I used lacquer spray. Unfortunately I forgot it is acetone based and made a mess of the labelling of the L293D PCB. Here is how it all looks now:


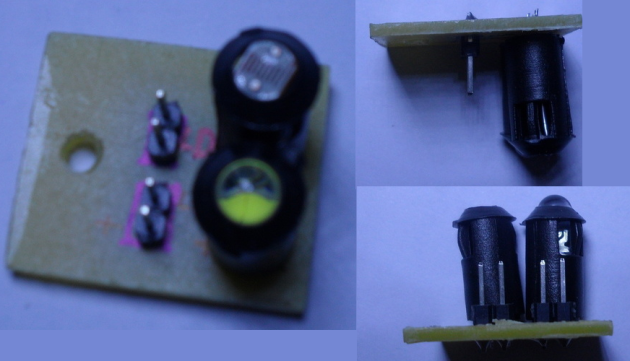
As you can see, I should have left a little more space at the edges. The copper in the photo is tarnished. It took a while for me to buy lacquer so this happened by then. A bit of sandpaper got it all cleaned up. My suggestion is to put the protective coating soon after you’re done soldering. Note that I have used berg pins instead of soldering the wires directly. Here is how I soldered the sensors:

Now that the electronics is mostly done, lets move on to the chassis. I used the same mechano plate as last time. For the sensors, I also used a mechano part. Note a few differences in the photos you are going to see and the actual robot. The photos below shows the 4-hole part. I replaced this with a 5-hole one later. Also I moved the PCB up to the front as the wires weren’t long enough. Finally I had to change the wheels as this construction was very unstable. You’ll see the corrections in the last photo. For the connections, I used female jumper wires such as these:

Before fixing the PCBs to the base, make sure you put something to protect the copper side. We do have a coating but better be safe than sorry. I used pieces of cardboard.

The chassis:
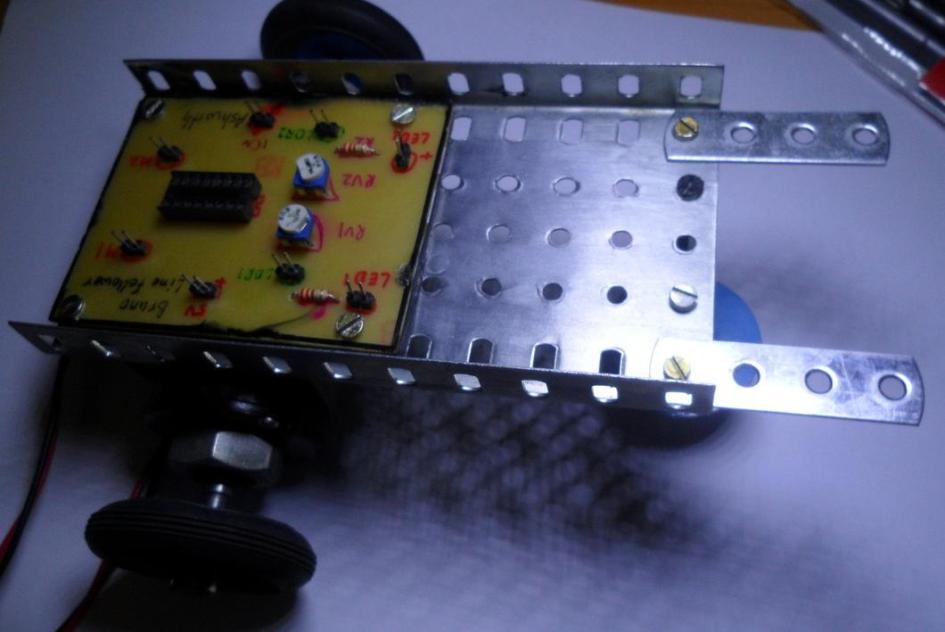
The corrected version. The sensor mounts are folded. I’ll explain this next. Notice how I used some screws to sort out the motor’s wires. I’ve kept these wires long as I’ll be using the same motors for other robots as well.

See how neat this is compared to the original robot? Finally here are a few photos of the complete robot.

Observe how the sensors have been mounted here. Metal mounts = no bending, if you’re careful enough of course. I found a big advantage of using these plates only after I completed the robot. You can fold these sensors under the main base. This further protects them from damage when you store the robot. This is what I mean:
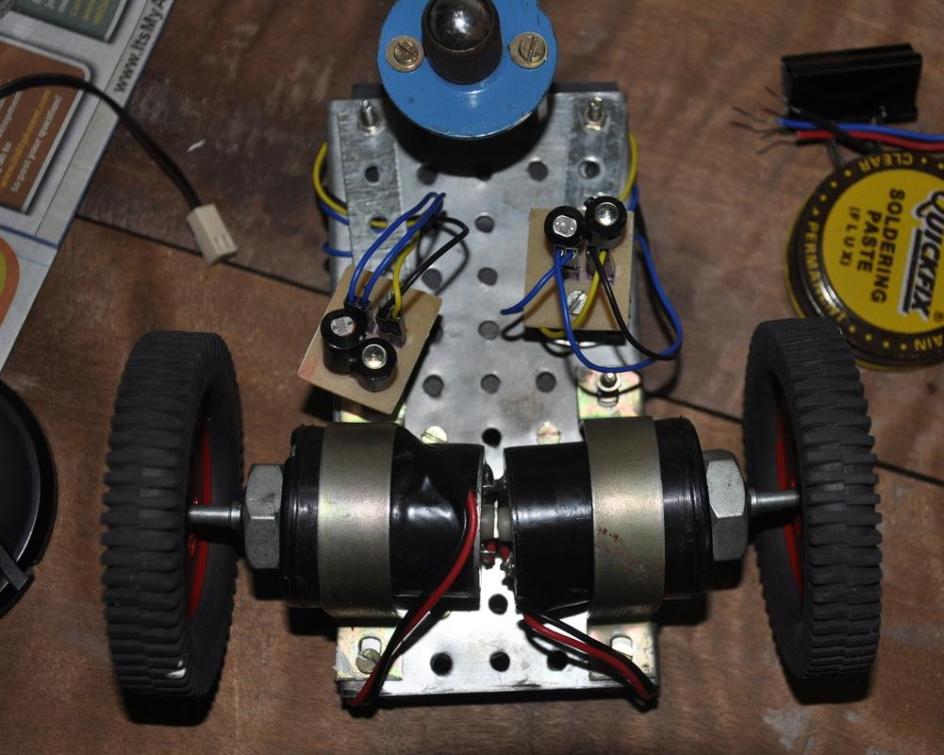
Pretty neat isn’t it? Finally these plates also make adjusting the distance between the sensors a lot easier. With the cardboard mount, you’d have to replace it each time the width of the line changed. In the new robot’s case it’s very simple:

As indicated above, you can freely adjust both the plate as well as the PCB. Again, remember to protect the copper side with something like cardboard. Finally, connect the batteries and you’re good to go:
I used larger wheels so the robot was a bit too fast. (v = r x ω). I put the batteries at the front to slow it down. It slows down because the friction on the front castor wheel increases. If you use the small wheels like last time, keeping the batteries at the back should work. Another reason to keep the batteries ahead is that it makes the robot more stable. Unfortunately the wires I used were too short so the PCB had to go to the front and the battery space got pushed back. I’ll probably join two wires to increase the length when I get time.
So that is the new and improved line follower! Hope you like this little upgrade.
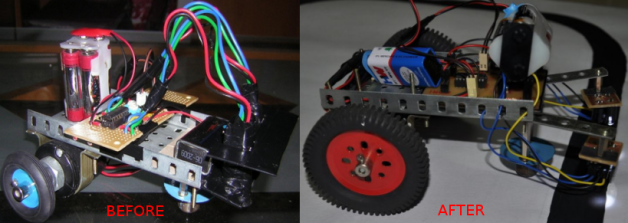
For my next activity, I will do the same upgrade for the table follower. We shifted to a new place last year and both robots, especially the table follower, were damaged in the process. The table follower’s mounts are broken. These new metal plates should make a more robust bot. I will also try to make it smaller by making smaller PCBs. I wasted a lot of space in this PCB as it was my first time.
I have also bought a bit of equipment. I will blog about it either during the week or on the weekend so stay tuned for details of my lab in progress
Please do tell me what you think in the comments below. I’m sure you will have much better ideas and I’d love to hear you out. Thanks for reading!
Update 1
I was able get longer jumper wires and reverted to the smaller wheels. I also used smaller beams for the sensors. Here is how my robot looks now.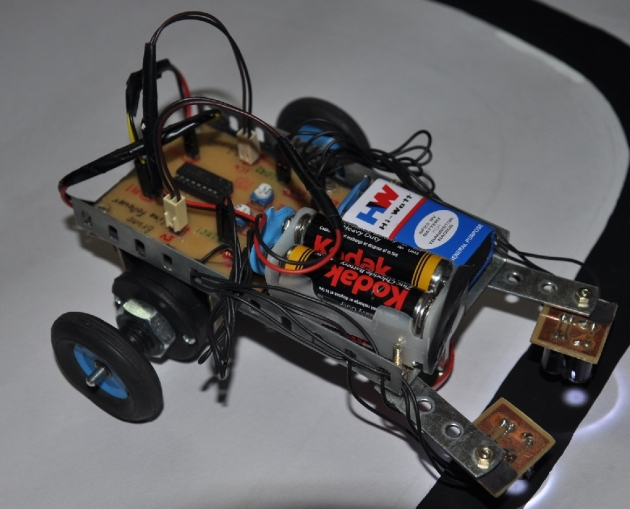

I also changed the motors to 150RPM. I’ll be using the 200RPM motors for the table follower update. I should hopefully be done this weekend.


Tiada ulasan:
Catat Ulasan